How to Bake Pork Tenderloin in Your Home Oven

Pork tenderloin, when cooked properly, offers a delightful balance of textures and flavors. The outside develops a slightly firm crust, while the inside remains incredibly juicy and tender, almost melting in your mouth. A mild, savory flavor makes it a versatile protein that pairs well with a wide variety of sides, from roasted vegetables to creamy sauces.
Baking is an excellent method for cooking pork tenderloin because it allows for even heat distribution, ensuring the meat cooks through without drying out. The controlled environment of the oven allows you to achieve a consistent level of doneness, making it a reliable technique for both novice and experienced cooks. With a few simple steps and readily available ingredients, you can achieve restaurant-quality results right in your own kitchen.
Understanding Pork Tenderloin
Pork tenderloin is a long, narrow muscle located along the backbone of the pig. It's known for its tenderness, as the muscle doesn't get much exercise. It's often confused with pork loin, which is a much larger and wider cut of meat.
What to look for when buying: Look for pork tenderloins that are pink in color and firm to the touch. Avoid any that appear grey or have an off-putting smell. The packaging should be tightly sealed, and the "sell by" date should be as far out as possible. Opt for tenderloins that are similar in size and thickness to ensure even cooking. A small amount of marbling (flecks of fat within the muscle) is desirable, as it adds flavor and moisture.
Why Cook Pork Tenderloin This Way?
- Versatility: Baked pork tenderloin is a blank canvas for flavor. Experiment with different rubs, marinades, and sauces to create a dish that suits your preferences.
- Flavor: Baking allows the natural flavors of the pork to shine through, while also creating a subtle crust on the exterior.
- Convenience: Once seasoned, the pork tenderloin simply needs to be placed in the oven and baked, freeing you up to prepare side dishes or attend to other tasks.
Preparation (Mise en Place)
- Thawing: If frozen, thaw the pork tenderloin completely in the refrigerator for 24-48 hours. Never thaw meat at room temperature, as this can promote bacterial growth.
- Trimming: Remove any silverskin (a thin, silvery membrane) from the surface of the tenderloin. This can be done by sliding a knife under the silverskin and pulling it away.
- Patting Dry: Pat the pork tenderloin dry with paper towels. This helps the surface to brown properly in the oven.
Essential Tools
- Baking Sheet: A standard baking sheet is necessary to support the pork tenderloin in the oven.
- Baking Rack (Optional): A baking rack placed inside the baking sheet elevates the pork, allowing for better air circulation and more even cooking.
- Mixing Bowl: Used to combine the seasonings for the rub.
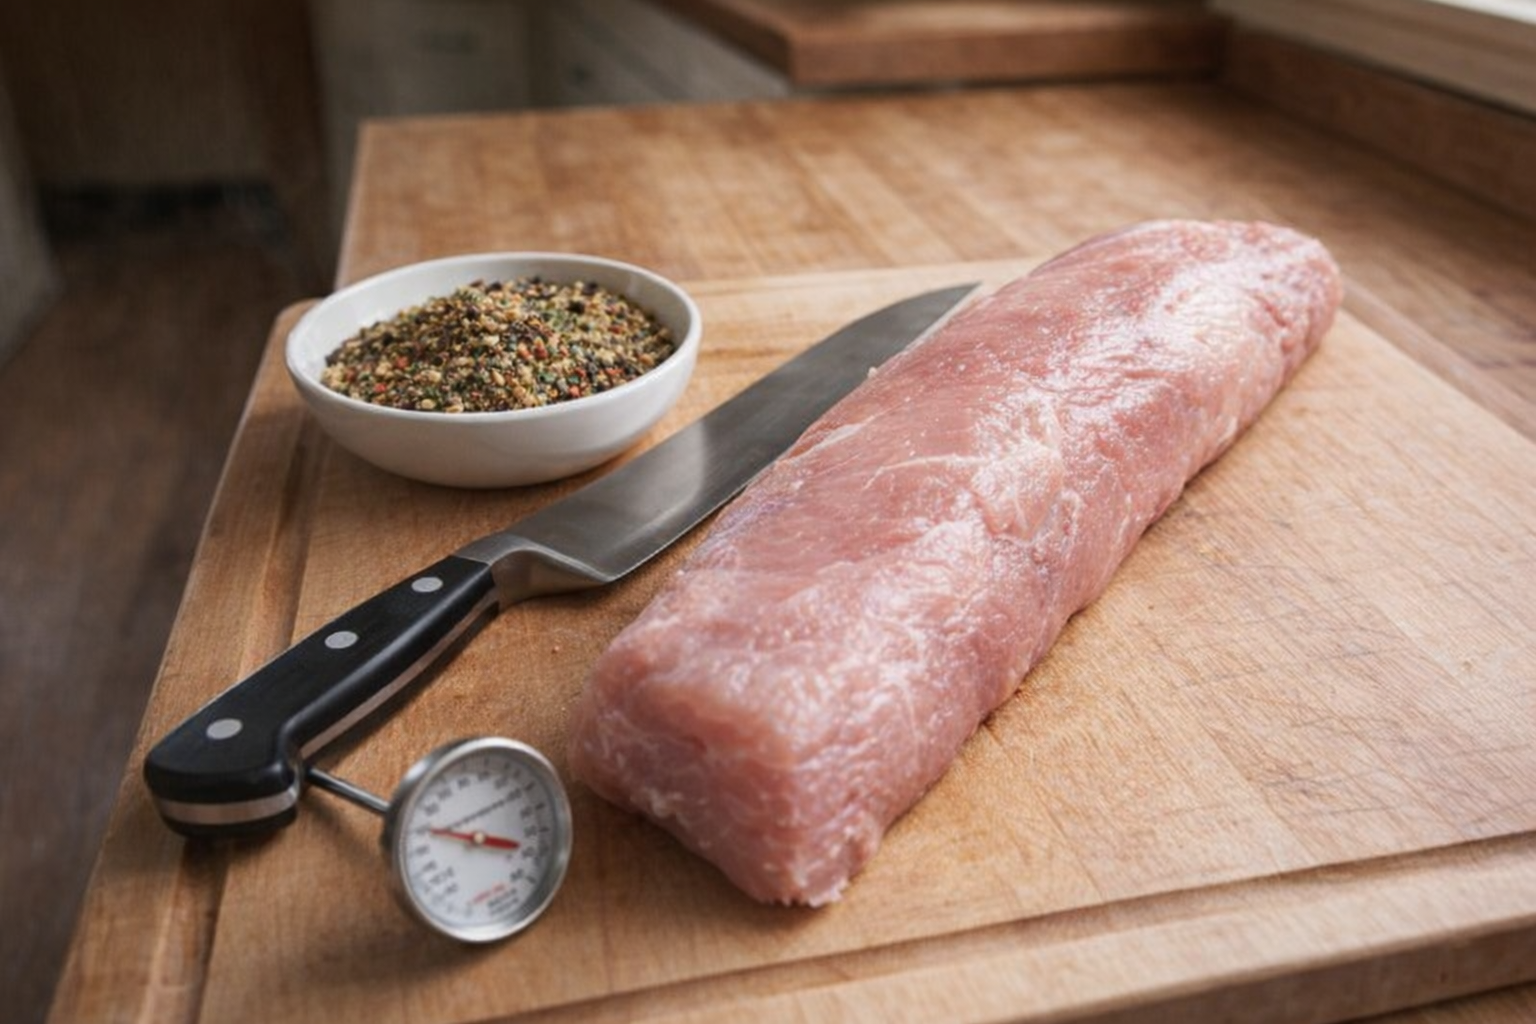
- Meat Thermometer: A reliable meat thermometer is crucial for ensuring the pork reaches the correct internal temperature.
- Chef's Knife: For trimming the silverskin.
The Cooking Method: Baked Pork Tenderloin
Here's how to achieve the perfect baked pork tenderloin:
Ingredients:
- 1.5 lbs (680g) Pork Tenderloin
- 1-2 tbsp Olive Oil or Melted Butter
- 1 tsp (5ml) Lemon Juice
- ½ tsp (2.5ml) Garlic Powder
- 1 tsp (5g) Salt
- ½ tsp (2.5g) Black Pepper
- 1 tsp (5g) Chili Powder
- 1 tsp (2g) Dried Herbs (such as thyme, rosemary, or oregano)
Instructions:
- Preheat the Oven: Preheat your oven to 400°F (200°C). This high temperature will ensure the pork browns nicely on the outside while remaining juicy inside. You should hear the oven fan start up, and the indicator light should illuminate to confirm preheating.
- Prepare the Pork: Pat the pork tenderloin dry with paper towels. Use a fork to pierce the meat all over; the goal is to create small holes which will help the seasonings penetrate.
- Make the Rub: In a mixing bowl, combine the garlic powder, salt, black pepper, chili powder, and dried herbs. Whisk together to ensure the seasonings are evenly distributed. The dry rub ingredients should smell fragrant and earthy.
- Season the Pork: Drizzle the olive oil (or melted butter) and lemon juice over the pork tenderloin. Rub the oil and juice into the meat with your hands to help the seasoning adhere. Then, generously rub the spice mixture all over the pork tenderloin, ensuring it's evenly coated. The pork should now have a rich, colorful coating of spices.
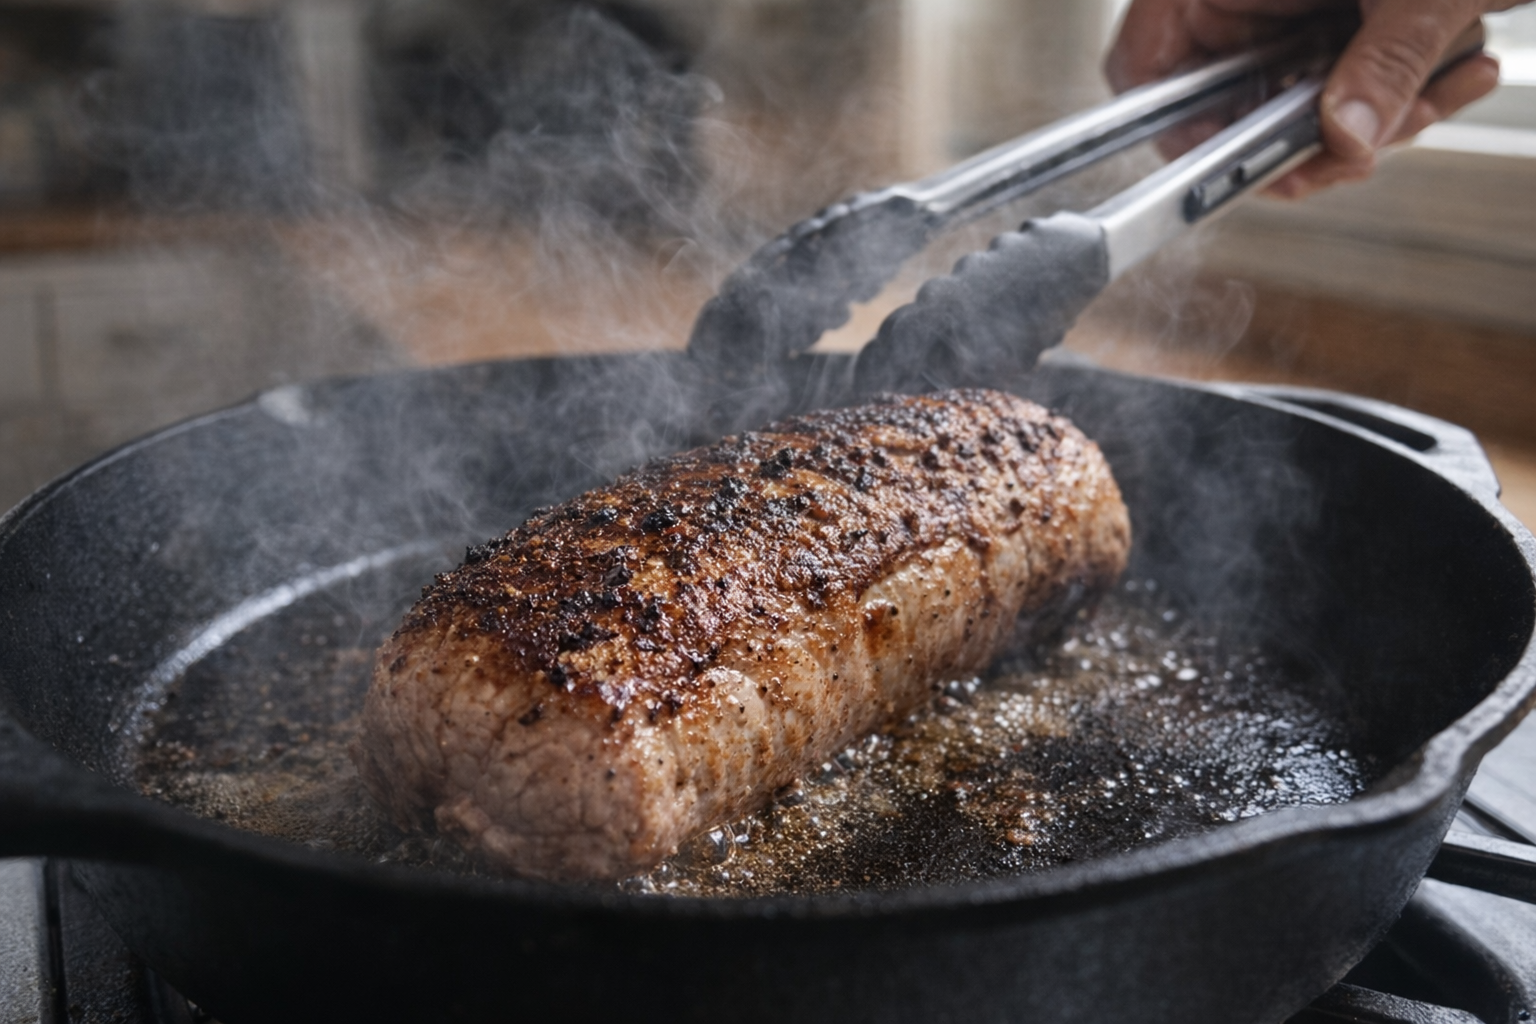
- Sear (Optional, but Recommended): Heat a tablespoon of oil in an oven-safe skillet over medium-high heat. Once the oil is shimmering, sear the pork tenderloin on all sides until browned, about 2-3 minutes per side. Searing helps to develop a flavorful crust. You should hear a satisfying sizzle as the pork hits the hot pan, and smell the Maillard reaction happening (browning of the meat).
- Bake: Place the seared pork tenderloin (or unseared, if skipping the searing step) on a baking sheet, or preferably on a baking rack set inside a baking sheet.
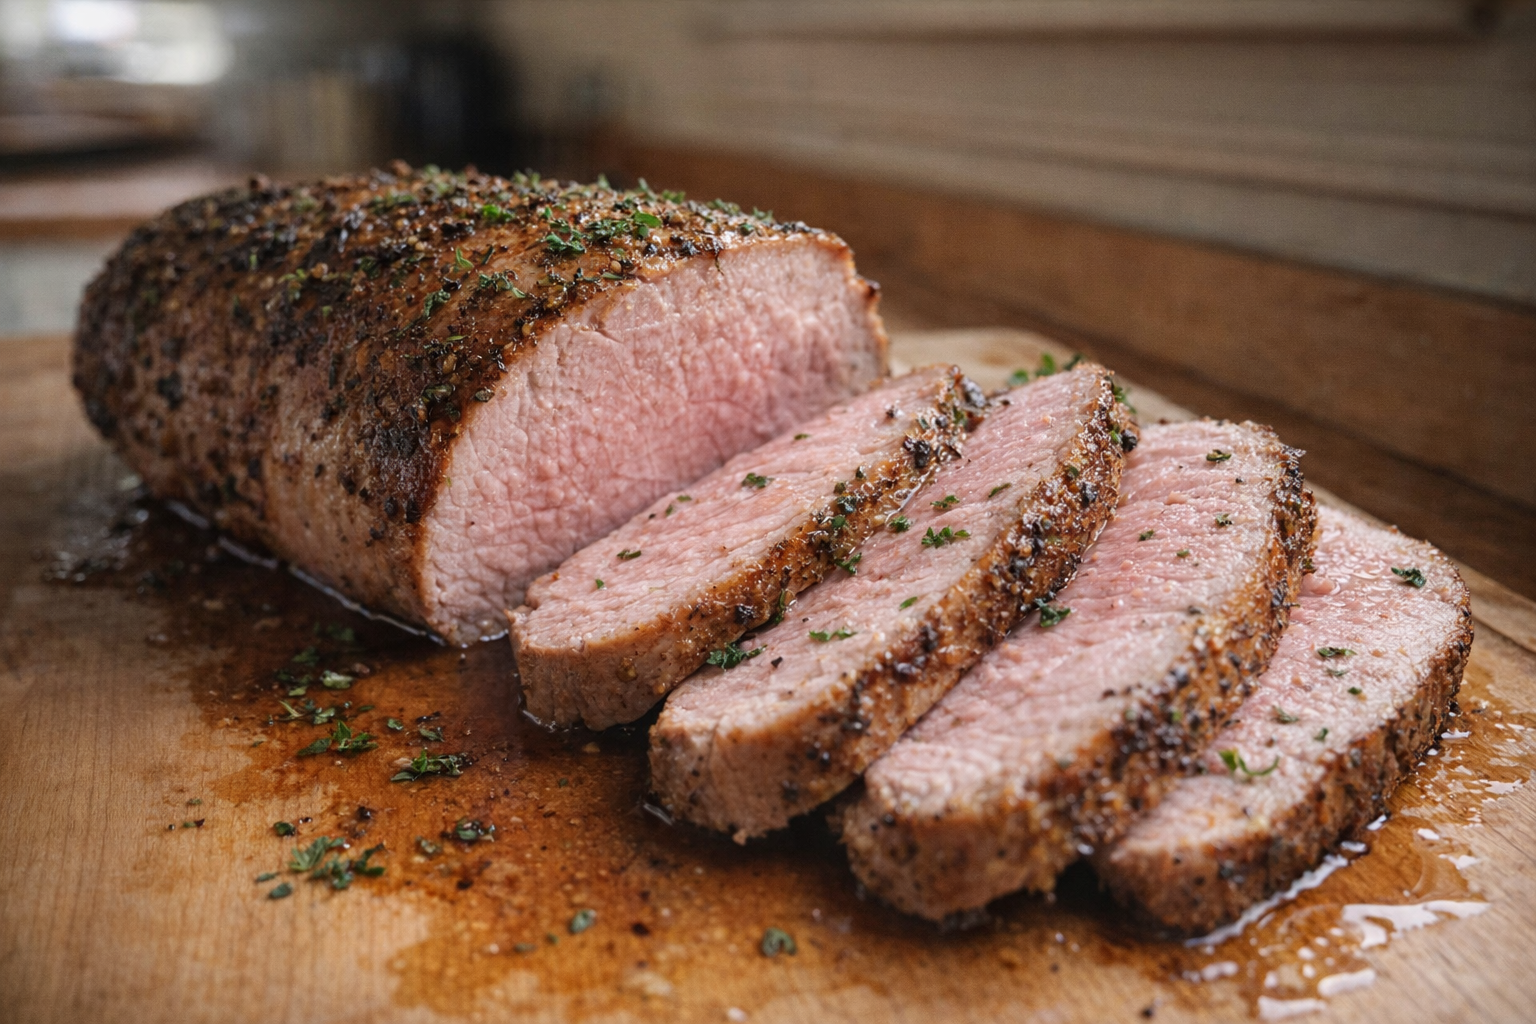
- Bake in the preheated oven for 20-25 minutes, or until the internal temperature reaches 145°F (63°C). As the pork bakes, you should smell the savory aroma of the spices filling your kitchen.
- Rest: Remove the pork tenderloin from the oven and let it rest for 5-10 minutes before slicing. Resting allows the juices to redistribute throughout the meat, resulting in a more tender and flavorful final product. During the rest, tent the meat loosely with foil.
Cooking Time & Doneness Guide
- Cooking Time: 20-25 minutes at 400°F (200°C) is a general guideline, but the actual time may vary depending on the thickness of the tenderloin and the accuracy of your oven.
- Internal Temperature: The most reliable way to determine doneness is to use a meat thermometer. Insert the thermometer into the thickest part of the tenderloin, avoiding bone. The internal temperature should reach 145°F (63°C) for medium doneness.
Visual Cues
If you don't have a thermometer, you can check for doneness by piercing the tenderloin with a fork. If the juices run clear, the pork is likely done. The pork should also feel firm to the touch, but not hard.
Tips for Perfection
- Don't Overcook: Pork tenderloin is best when cooked to medium doneness. Overcooking will result in dry, tough meat.
- Let it Rest: Resting the pork after cooking is essential for retaining moisture and ensuring a tender result.
- Use a Thermometer: A meat thermometer is your best friend when cooking pork tenderloin. It eliminates guesswork and ensures you reach the correct internal temperature.
- Season Generously: Don't be afraid to use plenty of seasoning to create a flavorful crust.
Storage & Reheating
- Storage: Store leftover pork tenderloin in an airtight container in the refrigerator for up to 3-4 days.
- Reheating: Reheat the pork tenderloin in a preheated oven at 325°F (160°C) until warmed through. You can also reheat it in a skillet over medium heat with a little oil or broth. Be careful not to overcook it during reheating.
Serving Suggestions
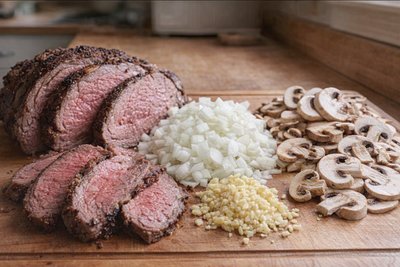
- As a Medallion: Slice the pork tenderloin into medallions and serve with a creamy sauce, such as a mushroom or dijon mustard sauce.
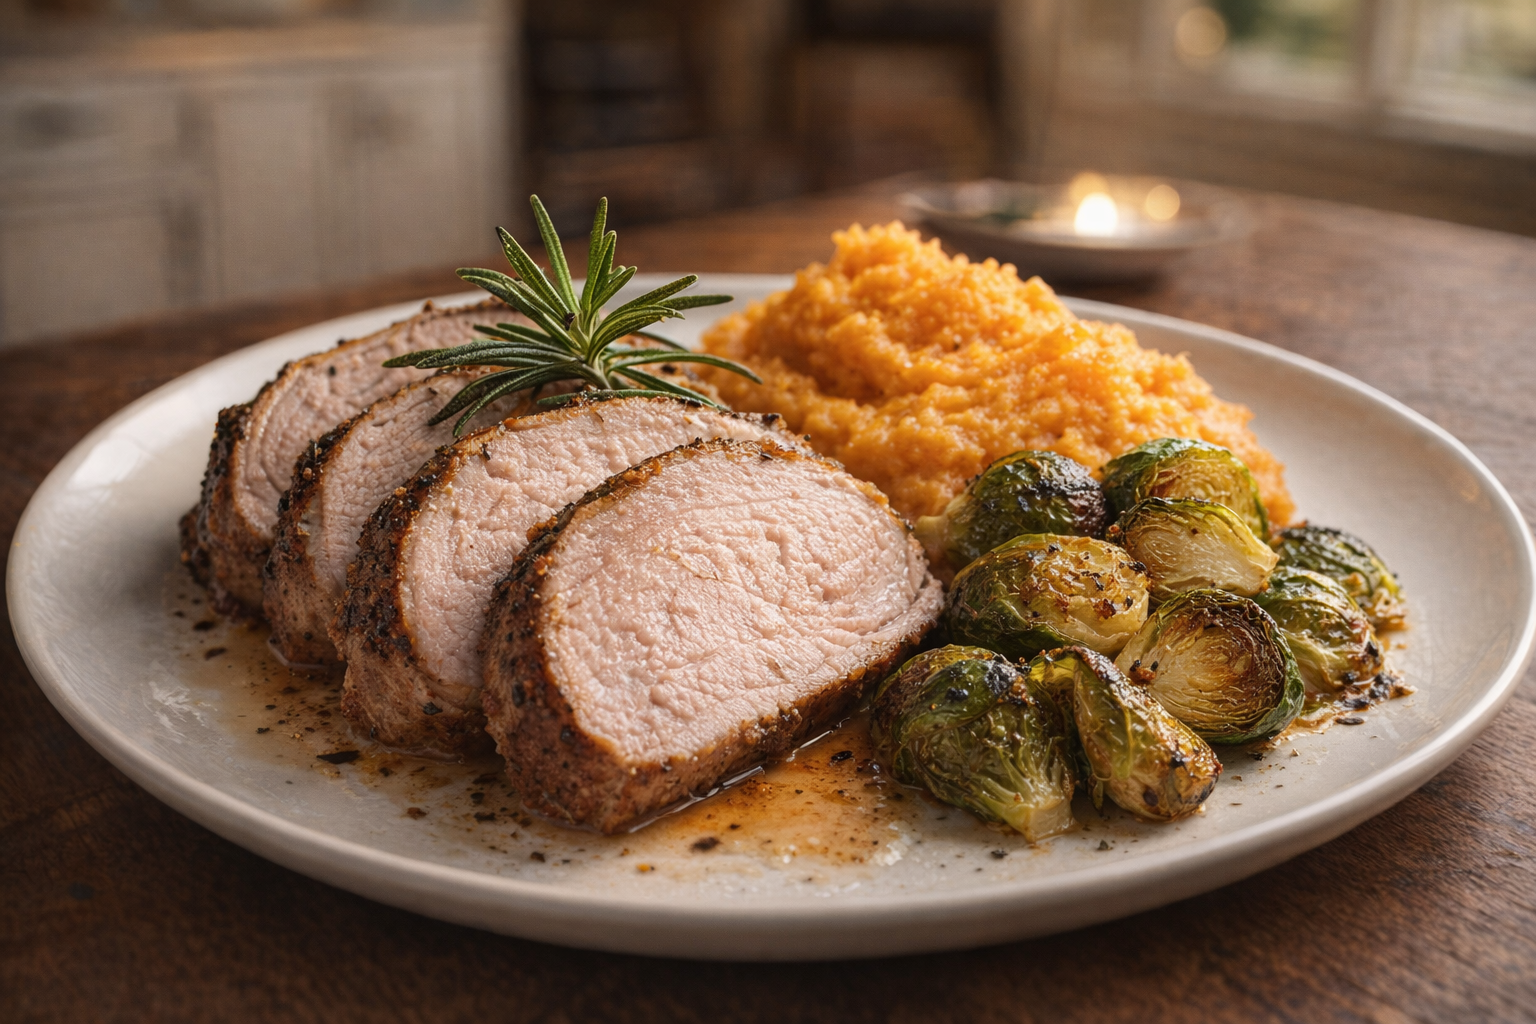
- With Roasted Vegetables: Serve the pork tenderloin alongside roasted vegetables, such as potatoes, carrots, and Brussels sprouts.
- In a Salad: Slice the pork tenderloin and add it to a salad with mixed greens, dried cranberries, and a vinaigrette dressing.
- On Tacos: Dice the pork tenderloin and use it as a filling for tacos, topped with your favorite salsa and toppings.
💡 Pro Tips
- Always use a digital meat thermometer to pull the pork from the oven when it reaches an internal temperature of 145°F.
- Allow the roasted tenderloin to rest on a cutting board for at least ten minutes before slicing to ensure the juices stay inside the meat.
- Sear all sides of the pork in a hot skillet with a little oil before placing it in the oven to develop a rich, golden crust.
- Trim away the tough, white silver skin from the surface of the meat using a sharp knife to ensure every bite is tender.
- Pat the pork completely dry with paper towels before seasoning to help the spices stick and promote better browning.
Frequently Asked Questions
The best way to ensure your pork tenderloin is cooked to a safe and delicious temperature is to use a meat thermometer. Insert it into the thickest part of the tenderloin, and it should read 145°F (63°C) for medium-rare, which is the recommended doneness for pork.
If you don't have a baking sheet, you can use a roasting pan or even a large oven-safe skillet. Just ensure that whatever you use is large enough to hold the pork tenderloin without overcrowding it, as this can affect even cooking.
Leftover baked pork tenderloin can be stored in the refrigerator for up to 3-4 days. Make sure to store it in an airtight container to prevent it from drying out and to maintain its quality.
If your pork tenderloin is browning too quickly, you can tent it loosely with aluminum foil. This will help to protect the surface from burning while allowing the inside to continue cooking through to the desired temperature.